Monday, September 21, 2009

Holiday Stout

Today I started to brew what to me is a very different beer, a bold and intriguing holiday stout with cherries and chocolate! It is categorized as an imperial stout but it should be quite interesting because of the chocolate and cherry adjunct. To be truthful, the original recipe I based this on came from the BeerTools Pro recipe database called "Black and Tam's Double Chocolate Cherry Stout". I adjusted the recipe to fit the ingredients I had on hand and this is what I came up with:

Ingredients:
1 lb American Black Patent
1 lb Black Roasted Barley
8 oz Munich 20L Malt
8 lb Ultralight Extract (MoreBeer)
3.0 lb Dry Amber Extract
2 oz Northern Brewer (8.00%) - added during boil, boiled 60 min
1 oz Willamette (5.00%) - added during boil, boiled 10 min
1 oz Willamette (5.0%) - added during boil, boiled 1 min
23 gr Fermentis S-04 Safale S-04
1.0 lb Dried Cherries, no pits - added during boil, boiled 0 min
3.0 tsp Hershey's cocoa - added during boil, boiled 0 min
2.0 tsp Cinnamon - added during boil, boiled 0 min
2.0 tsp Cloves, Nutmeg (1 tsp each) - added during boil, boiled 0 min

This brew was the first time I had the opportunity to use my new immersion chiller. That together with doing the boil in the kitchen instead of in my back yard as I did in my previous effort, made this a much smoother and efficient operation. But there are always inprovements but this went very well with a couple of exceptions.

Here is the immersion chiller with my boil kettle:

I'm using my double ring burner with an external propane tank so doing the boil was no problem.

This was my brewing plan:
Prep the boiling area.
-burner and gas tank
-wash boil kettle
-wash immersion cooler
-sanitize fermemtation bucket, lid, airlock, stirring spoon, measure cup etc
Boil 2 gal water and let cool (for yeast and to make-up the loss due to boil)
Mash tun (really steeping because these grains don't have any enzymes)
-bring 2.5l water to 150℃ and add grains in bag
-maintain at 150℃ for 30 minutes.

Boil kettle - steeping
-add 4 gal water and bring to 150℃
-sparge from mash tun (2liter)
-sparge additional 2 liter
-add DME slowly and stir
-add LME slowly and stir
-add 4 tablets alpha-galactosidase (Beano, 600 GaIU) and stir, leave for 30 minutes
-bring to boil and turn off heat

Boil kettle - boil
-add 2 oz Northern Brewer hops, boil 50 minutes
-add 1 oz Willamette, whilfloc insert immersion chiller, boil for 10 minutes

-turn of heat
-hydrate the yeast
-add 1 oz Willamette
-add cherries and cocoa, stir wait 15 minutes
-add cinnamon, nutmeg and cloves
-cool to 20℃ or so.

Fermenter
-siphon into fermenter
-add remaining hops for dry hopping
-shake rattle roll the fermenter to get good aeration.
-pitch the yeast

This what the wort looked like after the steeping and the DME and the LME were added:

Looks like a stout to me. And the wort tasted damned good even at this stage. Before continuing with the boil, I added the Beano and let it do its magic for 30 minutes. Not sure what this will to the F.G. and the alcohol content but this is something I wanted to try.

After the boil, I was so excited about using the immersion chiller that I forgot to add the whirlfloc! But the immersion chiller did its job, cooling the hot wort down to 25℃ in under 30 minutes. I don't have a pre-chiller so I added a bag (sanitized of course) of ice into the cooled wort to bring it down further to yeast pitching temperature.

After adding water to bring the wort volume back up to 5 gals, the O.G. came in at an amazing 1.098! The predicted O.G. is 1.093 so I'm not sure what this means.

I'm doing the fermentation in a plastic bucket fitted with a valve and because I'm not planning on doing a secondary fermentation, I will be able to bottle straight from the bucket, saving an extra racking step.

I had planned to use my aeration pump to do the aeration prior to pitching the yeast but the package I sent it in still has not arrived yet so I had to "shake the baby" which was a bit of a chore.

Well the yeast is starting to wake up and seeing the tremendous work it has in front of it. It will be a busy several days ahead for the little buggers. I plan to ferment for up to 2 weeks to give the yeast plenty of time to bring down the S.G. and up the alcohol.

Overall, I was very pleased with how this brewing effort went, especially compared to my last effort which was a back breaker. Doing the boil next to the sink so that I don't have to move 5 gals of liquid is a much better way to go. I should have got the chiller earlier.

This type of high gravity brew will need a long conditioning time, the original brewer suggested it gets better over time, up to a year. So I'm planning on drinking some this holiday season and saving the rest for next year. Can't wait to taste it.

***UPDATE*** 15 hours later
Wow, this is the most vigorous fermentation ever. I started with the airlock but it was clogged when I woke up this morning. I removed the lid and saw this:


So I removed the kraeusen and replaced the airlock with a blow off tube:


Here is some kinky blow off tube action:


Damn, I can hear the bubbles coming through the blow off while I'm typing this. Those yeasties are having a ball.

Tuesday, September 1, 2009

A visit to the states

I spent almost 4 weeks visiting family and friends in the states. And of course a lot of beer was consumed in the process. I'm only familiar with the United States and Japan but the craft beer has really broken out into the mainstream in the states. Not quite there yet here in Japan unfortunately but with fierce advocates such as the Beer In Japan web site, I hope this situation is changing.

My first stop was in Charlotte North Carolina to see my grandson and family. After picking me up from the airport my family took me to a local (NC style) BBQ joint. I love NC style BBQ and I try to make it here from time to time. Anyway here was the beer list from the place:


I was too hungry so I forgot to take pictures of the BBQ which was excellent, sorry. But here is a picture of some BBQ I made recently to fill in this space. Just as good the the NC stuff!

The next day, I went to the supermarket to pick up some necessary supplies (6 pack naturally), and this is what I was confronted with:
Mind you this is just the regular local supermarket, not a beer specialty store. I ended up with this, A Sierra Nevada Torpedo IPA, which is a double IPA. Right now, this is my favorite beer style. The Drifter Pale Ale turned out to be very nice as well.

My next stop was to Pittsburgh (home of the Superbowl champion Steelers) to visit some old friends. One of them being my ex. So one night she says I have to accompany her to visit one of her friends. After trying and deciding I could not get out of it, I told her I would go but we had to take separate cars so I could leave early if I wanted to. So she agreed to that. That is how I met Bill the brewer.

Bill turned out to be a very interesting man. For one thing, he built his house, and by build it, I meant almost every single nail in it. This is what his house looks like:

So Bill meets me as I got out from my car and after the introductions, he takes me into his basement and asks me if wanted a beer. Before I could ask what he had, he apologised because all he had was some Yuengling on tap, he actually apologized! For those of you not familiar with it, Yuengling is a very good lager made by one of the oldest (if not the oldest) continuously running brewery in the United States and has an excellent reputation for making very good craft style beers. I say craft style because they are a major regional brewery and not a microbrewery.

This is his beer on tap inside his homemade keg fridge:
Before I cold say the words myself, he says "I'm a home brewer". While he was saying this, I started to look around his basement and saw this:
These are 5 gal carboys filled with mead, some of which has been aging for over 10 years!

and this:
and this:

He had the most complete homebrewery I have ever seen. Most home breweries, especially those here in Japan, the equipment is set up to do the brewing and then taken down and stored away until the next time. Most of us here just don't have the luxury of a permanent brew setup like Bills. I wish I would have taken some better pictures because what I'm showing here just does not do justice to Bill's setup.

Anyway, after this introduction, I told my ex that it was a good thing that we came in 2 cars because she may be leaving before me!

Here is what I think he has:
Mash tun with a stirring motor to do what he says is reverse PIM (never heard of that before).
2 hot liquor tanks where he can do the boils
a steam pot (a modified pressure cooker) which he can use to maintain the mash temperature or sterilze his counterflow chiller or whatever else he needs steam for.
A LONG straight counterflow chiller.
The 2 pipes shaped in an extended "V" is Bill's counterflow chiller. It runs from his brew setup and runs to the other end of his basement.

And all of it is connected with a system of pipes, valves and pumps so that he never has to lift anything during the brewing process. He kegs his beers so there are no bottles involved as well.

Unfortunately he said he had not brewed in 5 years since he had to go back to work. But he did offer the fire up the equipment if I should come back for another visit. I had not planned on it but the offer was/is tempting.

The next day we went to church. Really we did. Here is the church:
But what kind of church you ask?

A little bit of Pittsburgh history is in order here. When Pittsburgh was steel town, many workers came here from many countries in eastern Europe and most were catholics of one sort or another. And this led to many catholic churches in the Pittsburgh neighborhoods, each one with a priest/pastor who spoke the language of the local congregation. I went to a Lithuanian catholic high school in Pittsburgh when I lived there. But as Pittsburgh matured and the steel industry was no longer the predominant industry, many of the people in the neighborhoods moved away, either to the suburbs or to other cities/states where there was better economic opportunity. This meant that a lot of the local neighborhood churches no longer had congregations big enough to sustain it. That left a lot of real estate of former churches available in Pittsburgh for the taking. So the Church Brew Works came into being.

It is now a full working brew pub and microbrewery. Where the altar used to be are the copper brewing kettles.

And here is the very happy me with the beer "sampler".
Each "sample" had to be at least 200ml. And of course none of it went to waste. Although most of the beers were very good, there were 2 that stood out for me, one was a super hoppy but not all that bitter IPA named "Thunderhop IPA" and a seasonal triple bock flavored with coriander. The Thunderhop was amazing in the hop flavor but because it did not have the corresponding extra bitterness, it was very refreshing and easy to drink. Damn, I wish I had some now. But the triple bock really stood out for me. I'm going to have to try some coriander in my next batch of home brew.

There was an enclosed courtyard with outdoor seating. The brick walls were covered with hop vines, very nice:

Next stop on my tour of the USA was in San Diego, home of Stone Brewing. Coming up next

Tuesday, July 14, 2009

Speakeasy Follow-up

Well the Speakeasy recipe beer is bottled and ready to drink. I had real worries about this batch, being my 1st 5 gal boil. I made several errors and I was sure that the entire batch was ruined. For one, I dropped the airlock into the secondary fermentation tank, 2 times! Also I had to rack to a secondary because too much of the trub was siphoned into the fermentation carboy. I tasted as I went along to see if there were any signs of contamination. But not being sure what the caramunich steeping grain flavor was supposed to be, it was kind of sweet caramelly taste where I was expecting a more hoppy flavor, I carried on and went ahead and bottled it.

2 weeks later, the beer seemed to have survived my mistreatment and turned out be be quite a drinkable brew, at least my friends seemed to think so. Because of the slight caramel sweetness, it was a hit with the ladies. Anyway I have over a case of 12 oz bottles of the stuff so at least I'm glad I don't have to get rid of the stuff.


Thursday, July 2, 2009

First 5 Gal Boil

I had to round up a few more pieces of equipment and lots of ice before I could commence my first 5 gal boil but I was able to get everything I need. First was a big plastic tub to hold the ice water to cool the hot wort kettle.

Next recognizing that moving around 5 gals of high gravity wort can be hard on my aging body, I bought a wheeled cart from my local home center.

Being a rank beginner, I bought a a brewing ingredients kit from MoreBeer called "Speakeasy 3rd Aniversary Brew". This is an extract+steeping grain kit that sounded like some beer that I wanted to drink. MoreBeer ingredients kits do not include yeast so I went with the Safale S04 dry ale yeast that I bought at Tokyu Hands.

MoreBeer brewing kit together with their ingredients gets you just about everything that you need to boil, ferment and bottle your beer. Of course I had to provide the boiling and bottling equipment and of course yeast.

I followed the instructions that came with the ingredient kit but I did run into a few unexpected (not if I had done additional research but more on this later) problems.

The process calls for
1. steep the flavoring grains in 170℉ water for 30 minutes,
2. add the liquid malt extract and bring to a boil,
3. add the bittering hops as soon as the boil commences
4. add flavoring and aroma grains according to schedule
5. add whirlfloc with 15 minutes left to boil

And that's it! Actually, this is when the process gets interesting, the whole cooling and racking to the primary fermenter.


I put 13 kg of ice into my plastic tub and then place the hot wort kettle on top. Once about half of the ice melted, I hosed in some water to bring the level up about halfway up the outside of the kettle and started gently rocking the kettle to get good exposure to the cold water. I think I was able to cool the wort to 85℉ in about 30 minutes. For future boils, I have plans on a hybrid sort of counter flow chiller to cool the wort.

At this point I brought the wort kettle inside and started setting up the equipment for racking to the primary fermenter, a better bottle plastic carboy.

When I opened up the lid to look at the cooled wort, I was shocked to see the huge amount floating trud in the wort. I guess the whirlfloc did its job but I was at a loss as to how to rack without bringing all this trud along to the carboy. Had I done better research prior to this step, I would have learned that I should have stirred the wort to create a whirlpool which would have compacted the trud in the center where it would have settled. Instead, I let the trud settle on its own and when it looked relatively clear I started the siphon. About 2/3rd of the way through, the unsettled trud entered the siphon much to my horror. Unfortunately I let it pass until about half a gallon was left in the kettle. What could I do at this point but to continue on. Because of all the trud that got sucked into the carboy, I decide I would rack to a secondary fermenter after a few days.


Anyway I pitched the rehydrated yeast at about 78℉ and shook the carboy for the aeration. In the future, I have ordered a portable battery operated aquarium air pump for this step. I added the airlock and placed into my bathtub where the water temperature was a pretty steady 69℉. BTW, in the picture above, the carboy is sitting on the rolling cart that I bought for about ¥2,000. This is a great back saver for moving 5 gals of wort around.


This is after 24 hours. There was a very active fermentation going on which was amazing to watch. So now all I have to do is to wait a few days and then I can rack to a secondary fermenter for further settling of the sentiment.


Sunday, June 21, 2009

5 Gal Brew kettle

Yesterday my friend brought over a stainless steel stock pot that I had in the past used to make a big pot of gumbo in. This and the propane burner he brought was all that was missing before I could take on my first 5 gallon batch of true brew. I would have done it today but it decided to rain, and I can't fire up that burner in the house! So instead, I will clean my house and get the kitchen ready for the big brew day. I think I have a lot of planning to do such as how and where am I going to cool 5 gallons of wort weighing up to 45 pounds for starters. Eventually I will get a wort chiller. Even still, moving it around may be a back breaker, literally.

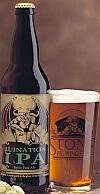
So instead, last night I went to Thrash Zone, a beer bar in Yokohama that I found about in this blog. Well Thrash Zone carries almost all of the Stone Brewing's beers, even one on tap! Now being from San Diego, Stone was (is) my favorite microbrewery. I plan on making a clone of their Arrogant Bastard ale as soon as I get all of the ingredients, now on order. At the Thrash Zone, I had a pint of the Stone Ruination IPA and what a shock to my system that was. I've been away from Stone beers for a while now and the hit my system with a double IPA was a bit much but very enjoyable. The bitterness was unrelenting but that is why you drink a double IPA right?

I would have had a bottle of ABA also but the IPA on my empty stomach said I'd better get something to eat or I would not be able to walk out of there. So ABA will have to wait until the next time. Even so, at ¥1300 for a pint of Ruination or ¥2000 for a bottle of ABA, I won't be able to indulge as much as I would like to. When I was in San Diego, I used to grumble because ABA was getting close $4.00 for a 22 oz bottle! How living in Japan changes my perception of what expensive is! I now know what I will be doing on my next visit to San Diego :)

Partying with Jero

This week, I had the opportunity to cater a dinner party for Jero. I served a blend of southwest and soul food to his friends.


Thursday, June 11, 2009

Naw'lins in Yokosuka

My son told me about a New Orleans style restaurant that recently opened near the Yokosuka Navy Base. Now I fancy myself a pretty gumbo chef and love the food of Louisiana in general and New Orleans specifically. I have spent many happy times of my life in Louisiana and have attended several jazz festivals in New Orleans. But it was always the food that brings me some of the best memories.

The name of the place is Naw'lins. I tried the oyster poboy. It was authentic and delicious. The french fries were also very good and spicy as just about any food from New Orleans should be. I also tried their gumbo. The gumbo was quite good but it was a bit watery for my taste, but of course I'm biased. I plan to go back there and try out the other items on their menu. Here is their flyer, try them out, it is the best New Orleans cuisine I have tasted in Japan so far (outside of my own kitchen of course!).

Living in Japan, access to good gumbo is few and far between, unless and of course I make my own gumbo which of course I do. And I've taught cooking classes on making gumbo to an eager Japanese audience several times.

Even so, getting the right ingredients to make gumbo is another problem that I have solved. The missing ingredient is the andouille sausage. I can get just about everything I need to make a good pot of gumbo in Japan except for the sausage. I solved the problem by making my own, well smoked and all. I've documented the process in my Benesse Japanese blog.

Here are some pictures of the process:

Start with some well marbled pork shoulder. Fat is essential to the sausage.

I use fresh thyme for the best flavor.

After mixing all of the ingredients and a rough grind, we have raw sausage ready for stuffing.

Good old KitchenAid, all purpose kitchen tool.

I used this stove top smoker for this batch but I now have an electric smoker which can do much bigger batches.

And here is the final product, beautiful authentic Louisiana andouille sausage in Japan.